Are you ready to make your AIS transceiver setup smooth and efficient? Whether you’re a boat owner, marine professional, or tech enthusiast, knowing how to plan your AIS transceiver and set up jobs with it can save you time and prevent costly mistakes.
This guide breaks down everything you need to know in simple steps, so you can get your system running without hassle. Keep reading to discover practical tips that will help you master your AIS transceiver setup quickly and confidently.

Credit: theancientmarinersblog.com
Choosing The Right Ais Transceiver
Choosing the right AIS transceiver is important for vessel safety. It helps you send and receive signals to avoid collisions.
This guide explains how to pick the best AIS transceiver for your needs. Focus on AIS classes, vessel type, and range.
Understanding Ais Classes
AIS transceivers come in Class A and Class B. Class A is for commercial ships and has higher power and update rates.
Class B is for smaller vessels like yachts and fishing boats. It uses less power and sends less frequent updates.
- Class A:Required for large commercial vessels
- Class B:Used by recreational and smaller boats
- Power:Class A transmits at 12.5 watts, Class B at 2 watts
- Update Rate:Class A updates every 2-10 seconds, Class B every 30 seconds
Selecting Based On Vessel Type
Choose an AIS transceiver that fits your vessel’s size and use. Commercial ships need Class A for compliance.
Smaller boats that travel near shore can use Class B. Consider your vessel’s speed and operating area as well.
| Vessel Type | AIS Class | Typical Use |
| Large Commercial Ship | Class A | Long voyages, heavy traffic areas |
| Fishing Boat | Class B | Coastal and local waters |
| Recreational Yacht | Class B | Day trips and near shore sailing |
Considering Range And Coverage
Range depends on the AIS power and antenna height. Class A has longer range than Class B.
Think about where you sail. Open sea needs more range. Coastal areas need less but steady coverage.
- Higher antenna placement improves signal range
- Class A transceivers cover up to 20 nautical miles
- Class B transceivers cover about 5 to 10 nautical miles
- Consider weather and obstacles that affect signal
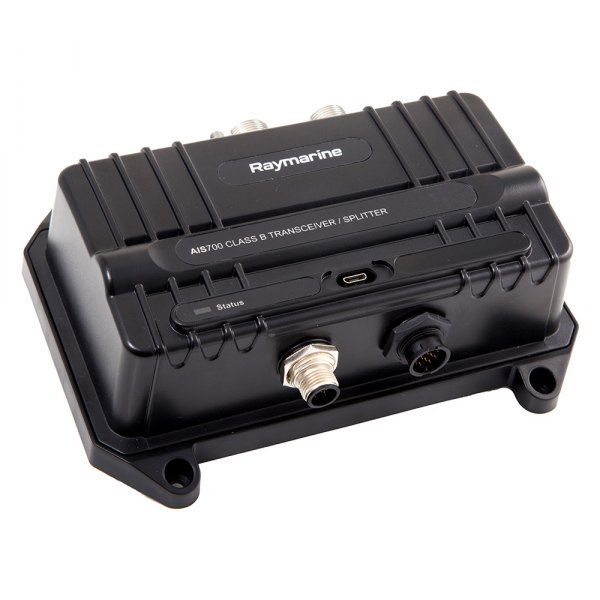
Credit: www.boatid.com
Installation Essentials
Setting up an AIS transceiver requires careful planning and proper tools. Good installation ensures clear signal and reliable communication.
This guide covers the key steps for installing your AIS transceiver safely and effectively.
Required Tools And Equipment
Gather all necessary tools before starting the installation to avoid delays. Using the right equipment makes the job easier and safer.
- Marine VHF antenna compatible with AIS frequencies
- Coaxial cables with low signal loss
- Power supply cable and fuse holder
- Screwdrivers and wrenches
- Wire strippers and crimping tools
- Drill with suitable bits for mounting
- Sealant to waterproof connections
Placement And Mounting Tips
Choose a location that offers good signal reception and easy access. Avoid metal obstructions that block the AIS signals.
| Mount Location | Recommended Height | Notes |
| Radar Arch | Above 2 meters | Clear line of sight, easy wiring |
| Cabin Roof | Above 1.5 meters | Good for small boats |
| Mast | Highest point | Avoid near metal rigging |
Wiring And Connectivity
Connect the AIS transceiver to power and antenna carefully. Follow the wiring diagram for your model to prevent damage.
Basic wiring checklist:
- Use marine-grade cables for power and signal
- Connect the positive wire to a fused power source
- Ground the transceiver to the boat’s common ground
- Run coaxial cable from antenna to AIS without sharp bends
- Seal all cable connections to prevent water ingress
Configuring Ais Transceiver Settings
Setting up your AIS transceiver correctly is important for safe navigation. Proper configuration helps your vessel communicate with others.
This guide covers key steps to configure your AIS transceiver. You will learn how to input vessel details, adjust transmission settings, and test signal quality.
Inputting Vessel Information
Start by entering your vessel’s details into the AIS transceiver. This information identifies your ship to other vessels.
Common details include your vessel’s name, type, and unique identification number.
- Enter the Maritime Mobile Service Identity (MMSI) number.
- Input the vessel’s name exactly as registered.
- Select the vessel type from the provided list.
- Fill in the vessel’s length and beam dimensions.
- Add the call sign if available.
Adjusting Transmission Settings
Set your AIS transmission settings to control how often your vessel sends information. This affects visibility to other ships.
Adjust settings based on your vessel’s speed and location to optimize message frequency.
- Choose the correct transmission power level.
- Set the message update rate for static and dynamic data.
- Enable or disable position reporting as needed.
- Configure the AIS class type (Class A or Class B).
- Check settings for automatic or manual transmission modes.
Testing Signal Quality
After setup, test your AIS signal to ensure it works properly. Good signal quality helps other vessels see your position clearly.
Use built-in test functions or external tools to check transmission strength and accuracy.
- Perform a self-test on your AIS device.
- Check if the device receives and sends messages correctly.
- Verify the signal strength using the AIS monitor.
- Look for any error messages or warnings.
- Confirm your vessel appears correctly on other AIS receivers.
Integrating With Navigation Systems
Planning an AIS transceiver setup includes connecting it with other navigation tools. This helps improve your boat’s safety and tracking.
Linking AIS with navigation systems allows real-time data sharing. This makes your navigation more accurate and efficient.
Connecting To Gps
GPS provides precise location data to your AIS transceiver. This lets the AIS send your exact position to nearby vessels.
To connect GPS, use NMEA 0183 or NMEA 2000 cables. These are standard connections for marine electronics.
- Check your AIS transceiver’s GPS input type
- Use correct cables for connection
- Verify GPS signal strength after setup
Syncing With Radar Systems
Syncing AIS with radar helps show nearby ships and objects on one screen. This improves situational awareness.
Use a compatible interface to link AIS data with your radar display. This allows your radar to show AIS targets clearly.
- Confirm radar supports AIS data input
- Connect AIS output to radar input
- Test target display for accuracy
Using With Chartplotters
Chartplotters show maps and navigation info. Integrate AIS to see vessel positions on maps.
Connect the AIS transceiver to your chartplotter using standard marine network connections like NMEA 2000.
- Check chartplotter compatibility with AIS
- Connect AIS to the chartplotter network
- Use chartplotter settings to display AIS info
Routine Maintenance And Troubleshooting
Proper care of your AIS transceiver keeps it running well. Routine maintenance avoids many common problems.
Troubleshooting helps fix issues quickly. Follow simple checks and updates to keep your system reliable.
Regular System Checks
Check your AIS transceiver often to ensure it works correctly. Look for physical damage and signal strength.
Verify power supply and connections. Clean any dust or dirt from ports and antennas.
- Inspect cables for wear or loose ends
- Test signal reception in different locations
- Confirm device powers on without errors
- Clean antennas and connectors carefully
Resolving Common Issues
If your AIS transceiver stops working, start with simple fixes. Check power and connections first.
Reset the device if it freezes or loses signal. Review error messages for clues about problems.
- Make sure power cables are secure
- Restart device to clear temporary faults
- Check antenna placement for obstructions
- Review error codes in user manual
Firmware Updates
Keep your AIS transceiver firmware up to date. Updates fix bugs and improve device performance.
Download updates from the official source. Follow instructions carefully to avoid errors during installation.
- Check manufacturer website for latest firmware
- Back up settings before updating
- Use stable power source during update
- Restart device after installing update

Credit: theancientmarinersblog.com
Enhancing Safety And Efficiency
Planning with an AIS transceiver helps ships stay safe and work better. It sends and gets information about other vessels nearby.
This data helps crews make smart choices to avoid accidents and save time on the water.
Monitoring Traffic And Weather
AIS transceivers show the positions of nearby ships. This helps crews watch traffic around them.
They also receive weather updates, so crews can see storms or bad conditions coming.
- Track ship locations in real time
- Receive weather alerts early
- Plan safe passages through busy areas
Improving Collision Avoidance
AIS transceivers help crews spot other vessels fast. This lowers the risk of crashes.
They send warnings if ships get too close, giving time to change course or speed.
- Show vessel speed and direction
- Alert crews about close ships
- Support quick decisions to avoid hits
Optimizing Route Planning
Using AIS data, crews can pick the safest and fastest routes. This saves fuel and time.
They can avoid crowded areas, bad weather, and hazards on the water.
- Choose clear paths with less traffic
- Adjust routes for weather changes
- Reduce travel time and costs
Frequently Asked Questions
What Is An Ais Transceiver And Its Main Function?
An AIS transceiver sends and receives vessel data using radio signals. It improves maritime safety by sharing real-time ship positions.
How Do I Set Up Ais Transceiver For Job Assignments?
Connect the AIS transceiver to your vessel’s power and antenna. Configure software with job details for efficient tracking and communication.
Can Ais Transceivers Enhance Maritime Job Scheduling?
Yes, AIS transceivers enable real-time location tracking, improving job scheduling accuracy and coordination among vessels and ports.
What Are Common Issues During Ais Transceiver Setup?
Common issues include antenna misalignment, power supply problems, and incorrect software configuration. Check connections and settings carefully.
Conclusion
Planning and setting up AIS transceiver jobs helps ensure smooth communication. Clear steps make installation easier and avoid common mistakes. Following the right process saves time and reduces errors. Proper setup improves safety and tracking on the water. Stay organized and double-check each step during setup.
This way, your AIS transceiver works well every time. Simple planning leads to reliable and effective AIS use. Keep these tips in mind for your next AIS transceiver project.